|
|
|
Categories
|
|
Information
|
|
Featured Product
|
|
|
 |
|
|
There are currently no product reviews.
 ;
Very well done!!!!! congratulations. It was a bit longer than usual the wiating time even if it was on time (in 24 hours).
;
Last week I bought a second hand BAUKNECHT TRK4850 DRYER. It is a professional machine with many programs and switch options. I feared it would be a huge quest to find a manual. I was delighted when I found owner-manuals.com. After payment I received the file to download the next day already. The quality is great. I am very happy. Thanks!
but kindly the distributions of the operating programs not find in the owners manual,can you help me to understand the operating programs instructions thank you
;
Very good copy, very readable and easy transaction as always.
;
It is perfect, exactly what we needed. It's like the paper version but less clutter.
 ;
Received my manual within 24 hours. Very clear scan of the manual I needed. Thanks!
2-4. White Balance Adjustment on Servicing
2-4-1. White Balance Adjustment
Input the 10 STEP signal to INPUT-A, and observe the chromaticity of each luminance. When varying the chromaticity of each luminance, perform the following adjustments. 1) MID Mode of INPUT-A 1. Input the 80 IRE FLAT FIELD signal to INPUT-A. 2. Adjust the chromaticity (x at 0.290, y at 0.320) values by the GAIN R and B of W/B MID mode. 3. Set the INPUT signal to the 30 IRE FLAT FIELD signal. 4. Adjust the chromaticity (x, y) to (0.290, 0.320) by the BIAS R and B. 5. Repeat above steps 1 to 4 until the chromaticity become the following values. (0.290 ±0.002, 0.320 ±0.004) 2) HIGH Mode of INPUT-A 1. Input the 80 IRE FLAT FIELD signal to INPUT-A. 2. Set the GAIN G to the integar of MID mode value x0.96 with the HIGH mode of the W/B. 3. Input the 30 IRE signal to INPUT-A. 4. Adjust the chromaticity (x at 0.284, y at 0.298) values by the BIAS R and B of W/B HIGH mode. 5. Input the 80 IRE signal to INPUT-A. 6. Adjust the chromaticity (x at 0.284, y at 0.298) values by the GAIN R and B. 7. Repeat above steps 3. to 6. until the chromaticity become the following values. x: 0.284 ±0.002, y: 0.298 ±0.004 3) LOW Mode of INPUT-A 1. Input the 80 IRE FLAT FIELD signal to INPUT-A. 2. Input the 30 IRE signal to INPUT-A. 3. Adjust the chromaticity (x at 0.313, y at 0.329) values by the BIAS R and B of W/B LOW mode. 4. Input the 80 IRE signal to INPUT-A. 5. Adjust the chromaticity (x at 0.313, y at 0.329) values by the GAIN G and B. 6. Repeat above steps 2 to 5 until the chromaticity become the following values. x: 0.313± 0.002, y: 0.329± 0.004 2-8
4) MID/HIGH/LOW Mode of VIDEO 1. Input the VIDEO signal of NTSC or PAL. 2. Set the BIAS R, G and B and GAIN R, G and B of MID, HIGH and LOW mode of W/B that are equal to the values of corresponding items in INPUT-A. (Altogether 18 items)
2-5. Tilt Adjustment
1. Set the Factory mode to �Device Adjust/OTHER�. 2. Adjust the stand and put the main unit into the horizontal state. (The horizontal state of this unit is forward tilted by _4 d.)
A
B
Align the A with the center position of the B.
_4d
Lever
Stand
3. 4. 5. 6. 7. 8.
Then, enter the X TILT value to C0. Set the unit upward in vertically. Then, enter the X TILT value to C1. Set the unit downward in vertically. Then, enter the X TILT value to C2. Save the each values of C0, C1 and C2 described in step3, 5 and 7.
VPL-HS2
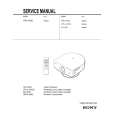 $4.99 VPLHS2 SONY
Service Manual Complete service manual in digital format (PDF File). Service manuals usually contains circuit diagr…
|
|
|
> |
|