Shopping cart is empty
 
English Polski Spanish 
Search For a Manual
 

(e.g. AA-V20EG JVC, ZX-7 Sony )
PayPal 1000+ rating Secure, Encrypted Checkout.
 
Support Info
ELECTROLUX
First point of contact:
All trademarks are the property of their respective owners
Categories
Information
Featured Product
Home >> ZANKER >> ZKB7238X Owner's Manual
 
 0 item(s) in your cart 

ZANKER ZKB7238X
Owner's Manual


Tweet about this product and get $1.00 of store credit for instant use!
  • Download
  • PDF Format
  • Complete manual
  • Language: English, German, French, Dutch
Price: $4.99

Description of ZANKER ZKB7238X Owner's Manual

Complete owner's manual in digital format. The manual will be available for download as PDF file after You purchase it.

Owner's Manual ( sometimes referred to as User's Guide or User's Manual ) contains information on how to use Your device. After placing order we'll send You download instructions on Your email address.

The manual is available in languages: English, German, French, Dutch

Not yet ready
You must purchase it first

Customer Reviews
There are currently no product reviews.
Other Reviews
 XREC11 AIWA Owner's Manual by Geoff Lowe;
The manual was exactly what I wanted and I found it nowhere else. Thanks!
 HD-600 KENWOOD Owner's Manual by John Copeland;
Having purchased a 1994 Kenwood music system from a Charity shop in 2013 (it was a high end product in its day), I found myself not quite knowing where to plug in what, and how to do this, that and the next thing. I needed a Manual, and after failure with another online 'Manual provider' I found Owner Manuals dot com. Well, I wasn't sure, but it was only $5, and if things didn't work out, I wouldn't have lost much... But things DID work out. After paying my childrens inheritance money, $4.99, I was sent a Manual for my Kenwood System very quickly. Alas, it was in German, and being Scottish, I could not read it or get my system in order from it...a rapid email to them brought the English Manual in short order, and my retro-system was and IS up and running in it's regulation settings. I am very grateful to http://www.owner-manuals.com for their quick service and for even having such an obsolete Manual in the first place! If you need a Manual for ANYTHING, try here first. I wouldn't be surprised if I bought a 1928 Marconi radio, and got the user Manual for THAT here too! Top marks. John Copeland Glasgow Scotland
 CADW248 AIWA Owner's Manual by Irene Lambert;
I was so happy that the owner's manual was available. It is well written and helped me to use the radio/CD player/recorder without problems. Thanks for making it available. Irene Lambert
 CXNMTD9 AIWA Owner's Manual by Paul Greer;
Excellant!!! Very quick and easy....Best $4.99 I have spent in a very long time.. I highly recommend this.
 PS-FL1 SONY Owner's Manual by Laurence White;
Thanks so much for the Owner's manual for my Sony PS - FL1. I had purchased the turntable off of eBay. It came in and looked great. Packed well and appeared to be great. I balanced and aligned the tone are and hooked it up. When trying to play a record the tone are would move to the right place and just before it would drop to play it moved back off the edge of the record before touching down. I searched the net for an answer to this issue. No luck. Then I purchased the owners manual and sure enough there was a place to adjust where the stylus touched down. That adjustment solved the problem and saved me a $35 feet to have the player checked out. The manual is well written and easy to understand. It is a must have for anyone with this front loading Sony turntable.

Text excerpt from page 16 (click to view)
Pflege und Wartung
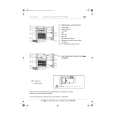
Vor dem Reinigen den Backofen ausschalten und abkühlen lassen. Das Gerät darf nicht mit einem Hei�dampfoder Dampfstrahlreiniger gereinigt werden. Wichtig Vor jeder Reinigungsarbeit das Gerät unbedingt spannungslos machen. Für eine lange Lebensdauer des Gerätes ist es nötig, regelmä�ig folgende Reinigungsarbeiten vorzunehmen: Durchführung nur bei abgekühltem Backofen. Die emaillierten Teile mit Seifenlauge reinigen. Keine Scheuermittel verwenden. Edelstahlteile und Glasscheiben mit einem weichen Tuch trockenreiben. Bei hartnäckigen Flecken handelsübliche Reinigungsmittel für Edelstahl oder warmen Essig benutzen. Backofensprays dürfen nicht für die Reinigung des Lüfterrades, des Thermostatfühlers und des Rückwandbleches im Innern Backofens verwendet werden. Sie nicht in Grillsteckdose spritzen. Die Emaiilierung des Backofens ist äusserst haltbar und weitgehenst unempfindlich. Die Einwirkung von hei�en Fruchtsäuren (Zitronen, Pflaumen oder ähnliches) können jedoch auf der Emailoberfläche bleibende, matte und rauhe Flecken hinterlassen. Solche Flecken in der Hochglanzoberfläche der Emaille beeinträchtigen die Funktion des Backofens jedoch nicht. Reinigen Sie den Backofen grundsätzlich nach jedem Gebrauch. Verschmutzungen lassen sich so am leichtesten entfernen. Ein weiteres Einbrennen wird damit vermieden. Emaillierte Teile: Email ist eine glasähnliche harte Beschichtung und daher sehr empfindlich im Umgang mit harten und kantigen Gegenständen. Bei einem Schlag oder durch Fallenlassen schwerer Gegenstände kann die Emaillierung abplatzen. Legen Sie den Backofen nicht mit Alufolie aus. Stellen Sie keine Backbleche oder Fettpfannen auf den Backofenboden. Diese Teile hindern die Hitze daran sich im Backofen zu verteilen. Es entsteht ein Wärmestau, der das Brat -und Backergebnis negativ beeinflussen und das Email zerstören kann. Bei Nichteinhaltung entfällt der Garantieanspruch. Ausbau der katalytischen Verkleidungsbleche (Sonderzubehör) In grö�eren Zeitabständen (gebrauchsabhängig) müssen die katalytischen Bleche zur Reinigung des Backofens ausgebaut werden. Gerät durch Herausnahme der Sicherungen stromlos machen. Tropfenauffangblech herausnehmen. Einschiebeführungen abschrauben (Abb. 6). Seitliche Bleche abziehen (Abb.7). Rückwandblech abschrauben (Abb.8). Reinigung siehe �Katalytische Verkleidungsbleche� sowie �Pflege und Wartung�. Einbau erfolgt in umgekehrter Reihenfolge. Austausch der Backofenlampe Das Gerät stromlos machen! Glaskappe leicht drücken und abschrauben (Abb.9). Defekte Glühlampe austauschen. Glühlampe 25 W, 220/230V (50Hz), 300°C, E 14. Glaskappe wieder anbringen. Einbau der anderen Teile erfolgt in umgekehrter Reihenfolge. Gerät wieder anschliessen.

17

You might also want to buy

$4.99

SX-K700 TECHNICS
Owner's Manual

Complete owner's manual in digital format. The manual will be available for download as PDF file aft…

$4.99

CJ-V51 PIONEER
Service Manual

Complete service manual in digital format (PDF File). Service manuals usually contains circuit diagr…

$4.99

GRAND PRIX ELECTRONIC 754 BECKER
Service Manual

Complete service manual in digital format (PDF File). Service manuals usually contains circuit diagr…

$4.99

SX-PR602 TECHNICS
Service Manual

Complete service manual in digital format (PDF File). Service manuals usually contains circuit diagr…

$4.99

EV-S1000E SONY
Owner's Manual

Complete owner's manual in digital format. The manual will be available for download as PDF file aft…

$4.99

GRAND PRIX ELECTRONIC 780 BECKER
Service Manual

Complete service manual in digital format (PDF File). Service manuals usually contains circuit diagr…

$4.99

AG7330 PANASONIC
Service Manual

Complete service manual in digital format (PDF File). Service manuals usually contains circuit diagr…

$4.99

MECABLITZ 60 CT4 METZ
Service Manual

Complete service manual in digital format (PDF File). Service manuals usually contains circuit diagr…
>
Parse Time: 0.899 - Number of Queries: 128 - Query Time: 0.488